
MSWord-How to add index to document - วิธีเพิ่มสารบัญในเอกสาร

There are few steps to add and update index to your MS Word document. Please note before create index, you need to create heading first. To create heading please see entry below.
การเพิ่มสารบัญในเอกสารไมโครซอฟต์เวิร์ดสามารถทำได้ง่ายๆ เพียงไม่กี่ขั้นตอน แต่ก่อนจะเพิ่มสารบัญ ต้องมีการกำหนด heading ของเนื้อหาแต่ละส่วนให้เรียบร้อยก่อน ดูวิธีสร้าง heading จากบทความข้างล่างนี้ได้ครับ
To adding index to your MS Word document please follow below steps
ขั้นตอนการเพิ่มสารบัญในเอกสารไมโครซอฟต์เวิร์ด
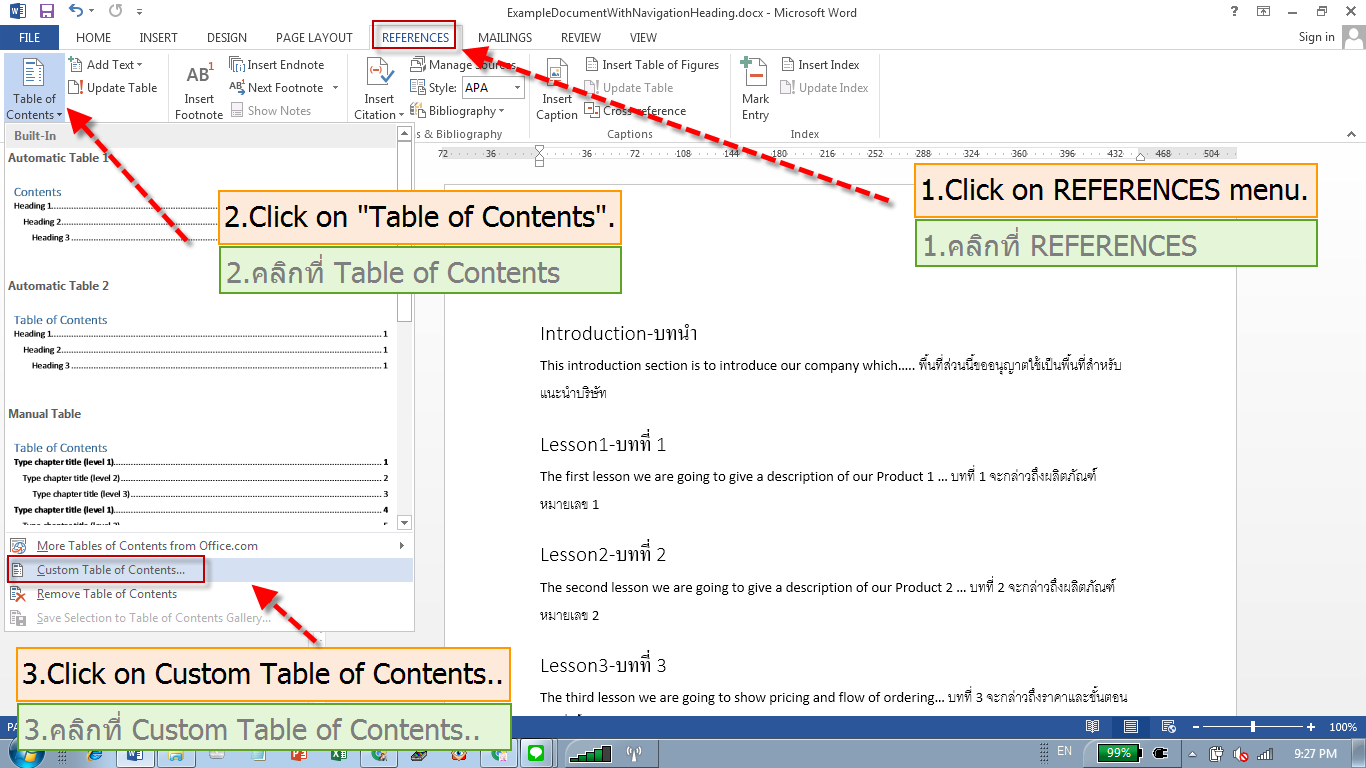
1. Prepare space above your top content by hit "Enter" key to push your top content down one line. Then click on "REFERENCES" menu.
เตรียมพื้นที่สำหรับวางสารบัญ โดยการเคาะ Enter ให้เนื้อหาส่วนบนสุดลงมาข้างล่าง 1 บรรทัด แล้วคลิกที่เมนู REFERENCES
2. Click on "Table of Contents" - แล้วคลิกที่ "Table of Contents.."
3. Then click on "Custom Table of Contents" once the drop-down menu appear. - แล้วคลิกที่ "Custom Table of Contents.." จาก ดรอปดาวน์เมนู
4. Once "Table of Contents" windows show up, select "Formats" as "From template"
เมื่อหน้าต่าง "Table of Contents" เปิด เลือก "From template" ในหัวข้อ "Formats"
5. Then select "Show levels" as "3". (This meant the index will show heading for 3 levels, for this example you have created only heading 1 which is 1st level so our example will show only 1 level)
แล้วเลือก 3 ที่หัวข้อ "Show levels" (หมายถึงให้แสดง heading หรือ หัวข้อ 3 ระดับ จากตัวอย่างนี้จะแสดง 1 ระดับคือระดับบนสุด เนื่องจากเราสร้างในตัวอย่างเพียง 1 ระดับ คือ heading1)
6. Then click "Ok" to create index - แล้วคลิก "Ok" เพื่อสร้าง สารบัญ

7. An "index" will show above your current content which is also current position of cursor. (remember that we need to prepare this space before click on "References" menu.)
สารบัญจะแสดงเหนือ "เนื้อหา" ส่วนบนสุด หรือตามตำแหน่งปัจจุบันของเคอร์เซอร์ (ตามข้อ 1 เราต้องเตรียมพื้นที่ส่วนนี้ไว้ก่อนที่จะเริ่มคลิกเมนู "References")

8. Now we got index show on top of the content, then we just click on the left end of first character of the index and hit "Enter" to make a space above and type "Index" or any proper wording.
หลังจากได้ สารบัญแสดงอยู่ด้านบนเนื้อหาแล้ว คลิกที่ด้านซ้ายสุดของตัวอักษรแรกของสารบัญแล้วเคาะ Enter เพื่อให้มีที่ว่างด้านบน แล้วพิมพ์คำว่า "สารบัญ"
9. Once we get index done, now we can start arrange the document using help of "Enter" key to push each heading to stand in a proper page.
เมื่อเราได้สารบัญแล้ว ถัดมาเราทำการจัดหน้าเอกสารโดยเคาะ Enter เพื่อให้หัวข้อต่างๆ ไปอยู่ในหน้าที่ต้องการ

10. Now the page arrangement has been completed, to get to each heading, no need to scroll down just go to index and hold "Ctrl" button then click on heading name on the index. You can directly go to that page.
เมื่อจัดหน้าเสร็จแล้ว หากต้องการไปที่เนื้อหาในแต่ละหัวข้อ ให้ไปที่ สารบัญแล้วกดคีย์ "Ctrl" ค้างไว้แล้วคลิกที่ชื่อหัวข้อในสารบัญ จะสามารถไปที่หน้าที่หัวข้อนั้นอยู่ได้ทันที

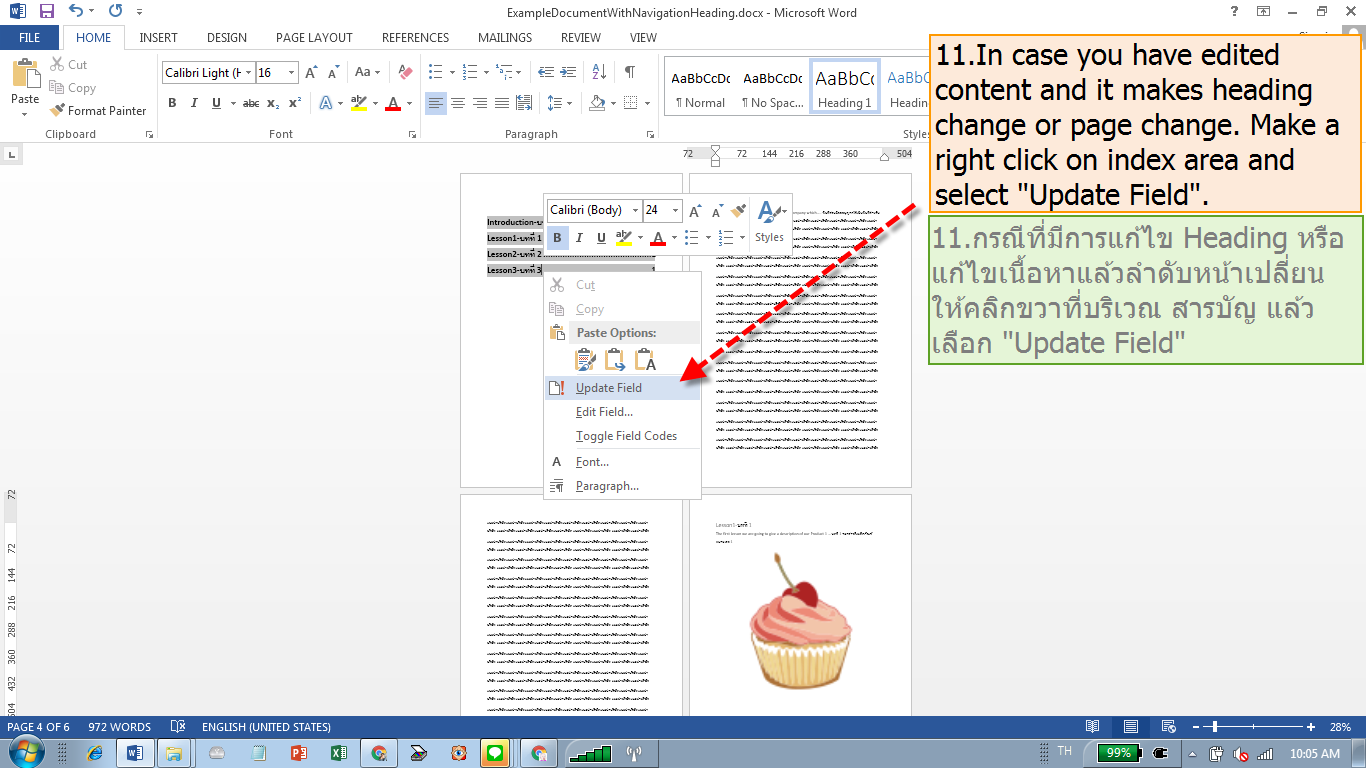
11. To update page and heading (in case you have added up content or edit heading), just move cursor to be over the index area and do right click, then click on "Update Field".
หากมีการแก้ไขเช่น เพิ่มเนื้อหา หรือแก้ไขชื่อหัวข้อ ให้นำเม้าส์ไปวางเหนือพื้นที่สารบัญ แล้วคลิกขวา แล้วคลิก "Update Field"
12. Then click "Update etire table" and click "Ok". - แล้วคลิก "Update etire table" แล้วคลิก "Ok"

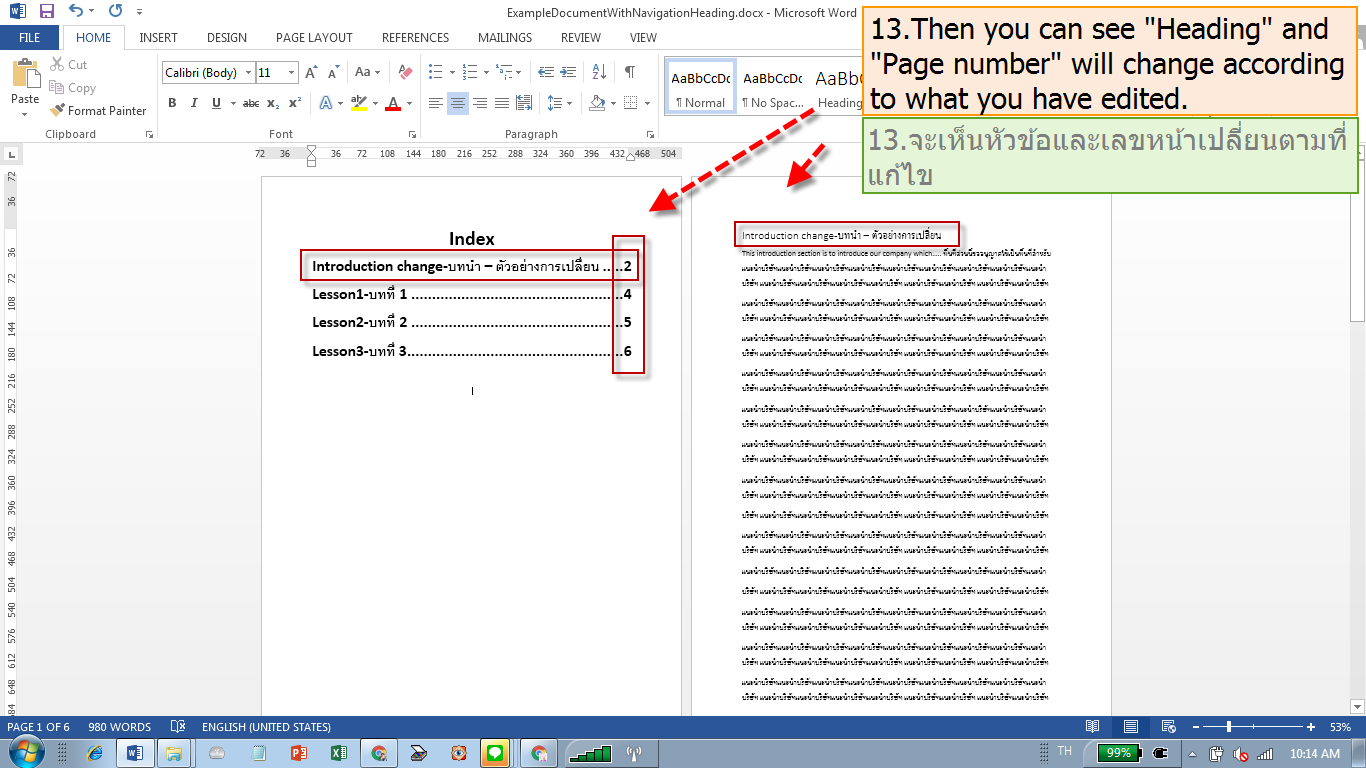
13. Then you can see "Heading" and "Page number" change according to your editing.
จะเห็นได้ว่าชื่อหัวข้อและเลขหน้าจะเปลี่ยนตามที่มีการแก้ไข
Download example of this document by clicking below link.
ดาวน์โหลดเอกสารตัวอย่างได้จากลิงค์ข้างล่างนี้